
Integrate Vyapar with Vyapar TaxOne in 4 simple steps—enable sync, link accounts, grant access & sync data. Follow the step-by-step guide with images for setup.
1. Open Vyapar and select the company you want to integrate.
2. Navigate to Sync, Share, and Backup.
3. Enable Sync to allow data sharing with Vyapar TaxOne.
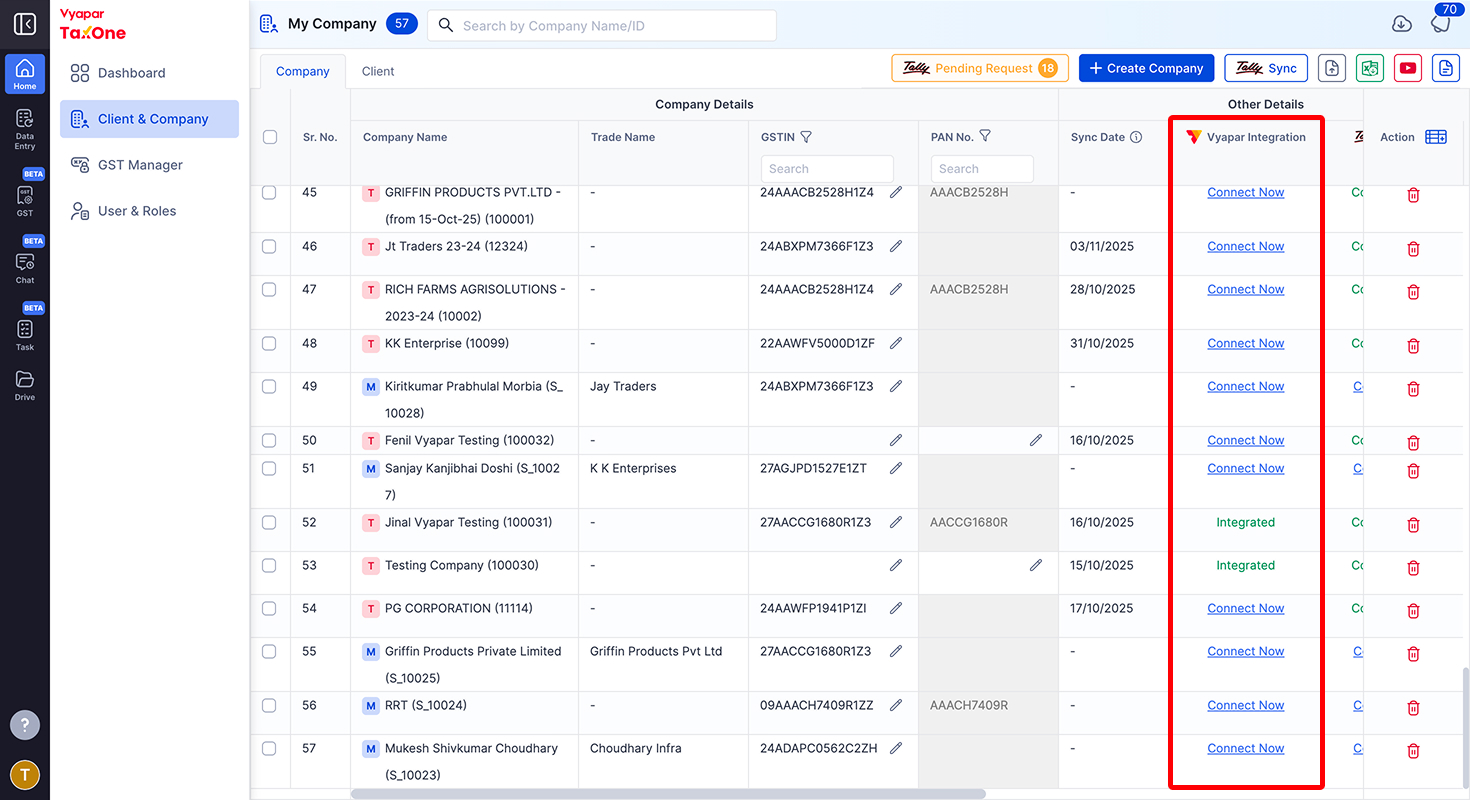
1. Login into Vyapar TaxOne. Go to Company
2. Vyapar integration
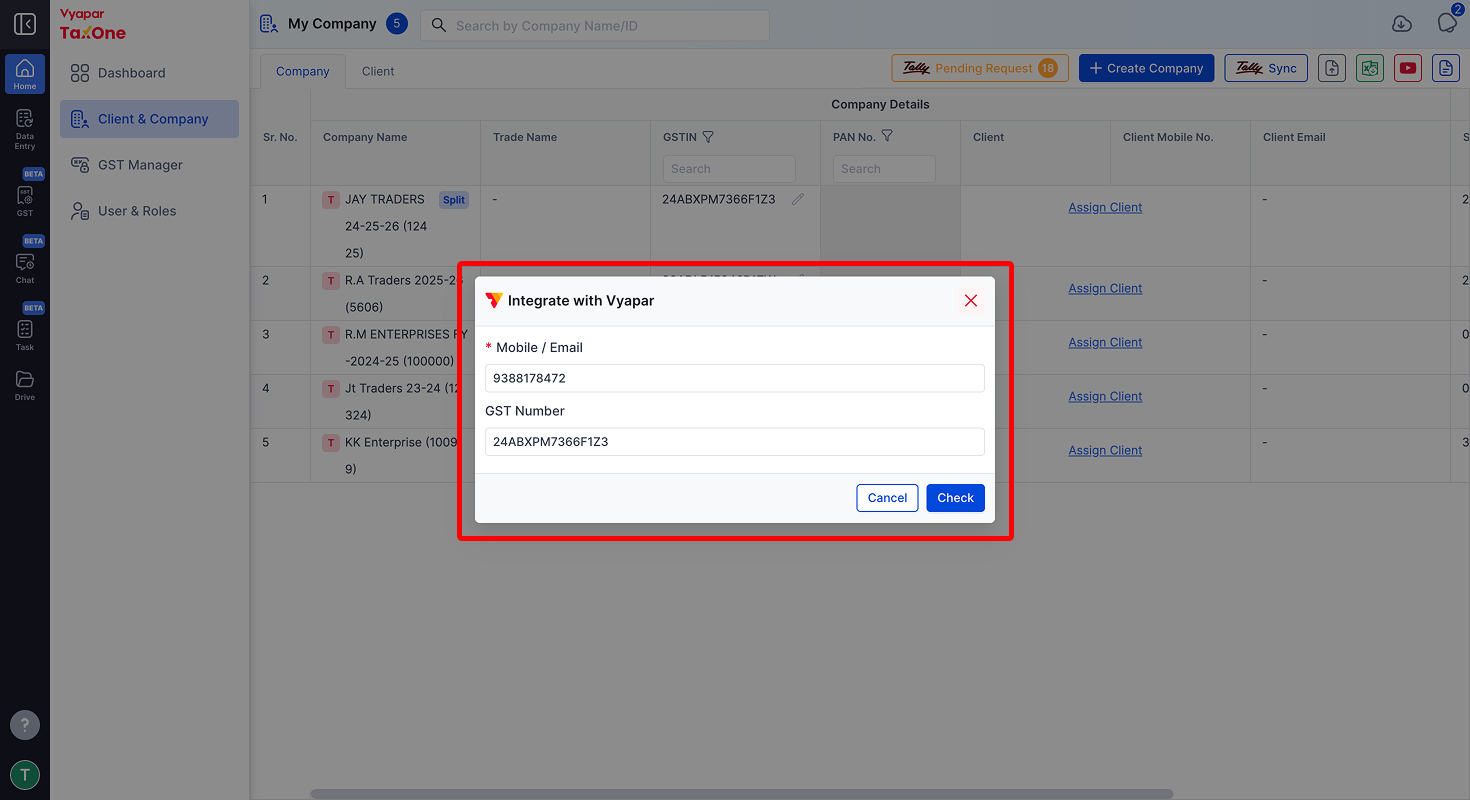
3. Enter details
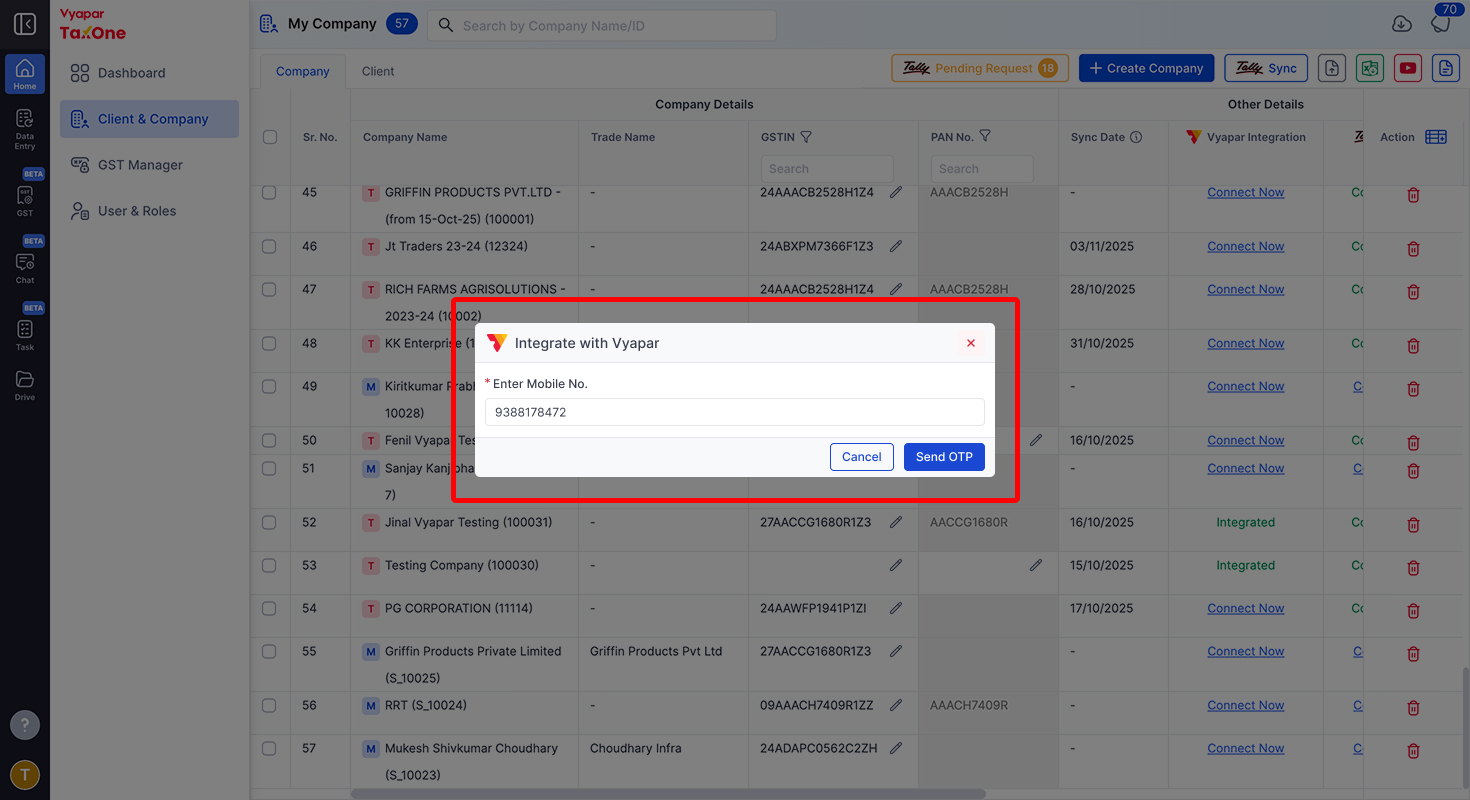
4. Send OTP
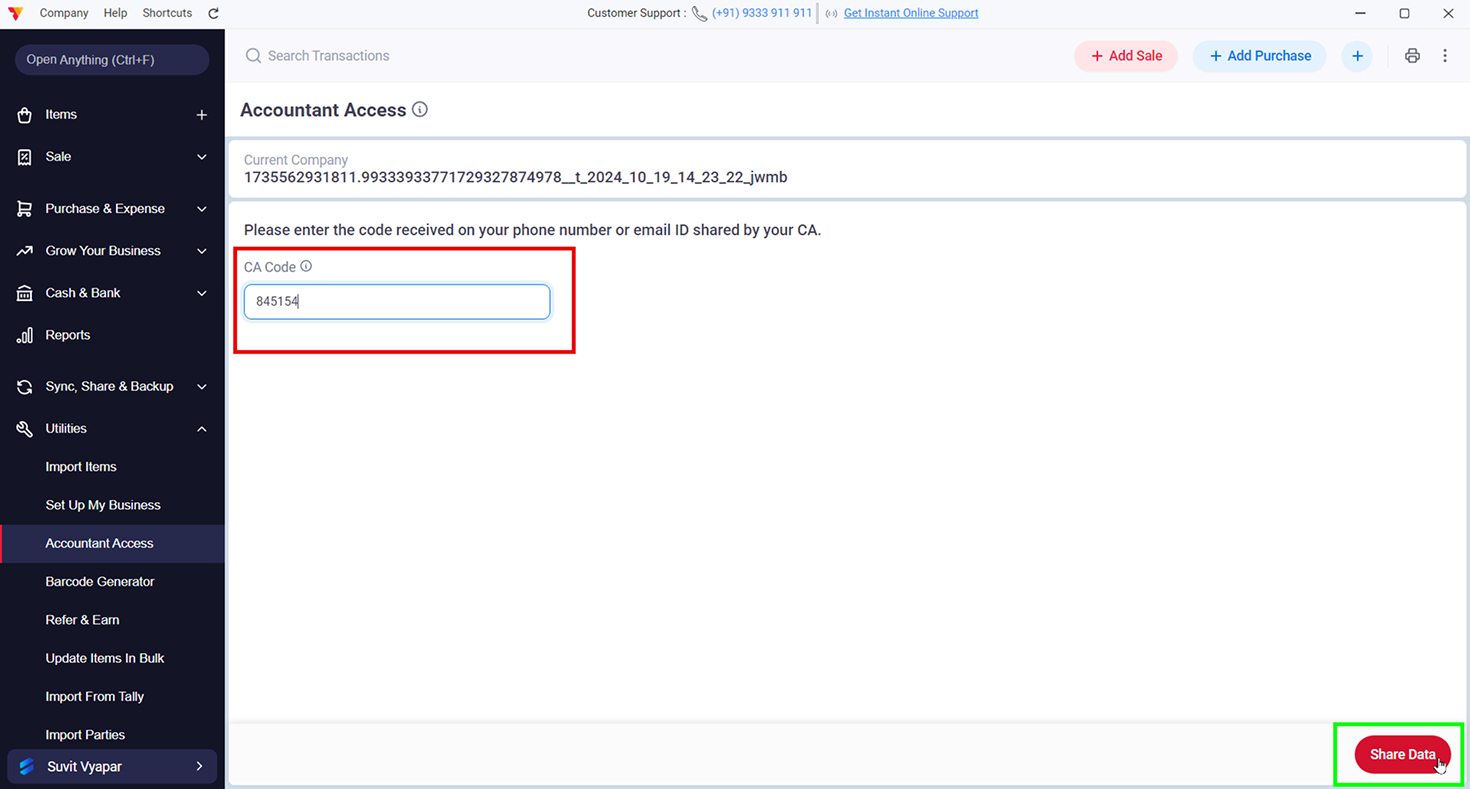
1. Go to Vyapar → Utilities → Account Access.
2. Click on Retry.
3. Enter the OTP received and confirm the access. (OTP will be received on WhatsApp)
1. In Vyapar TaxOne, navigate to Data Entry Automation → Explore Now → Master → Mapping.
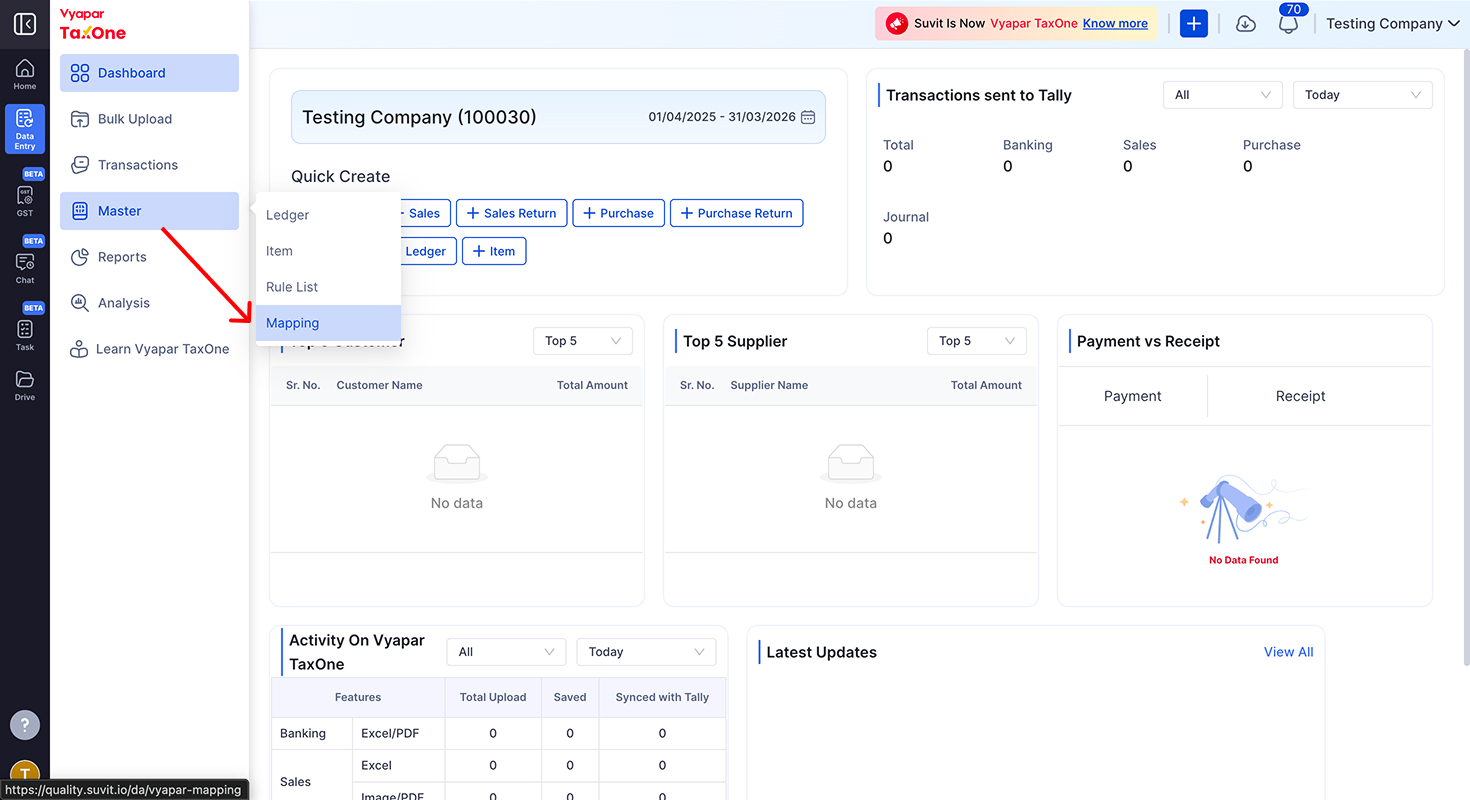
2. Click on Sync.
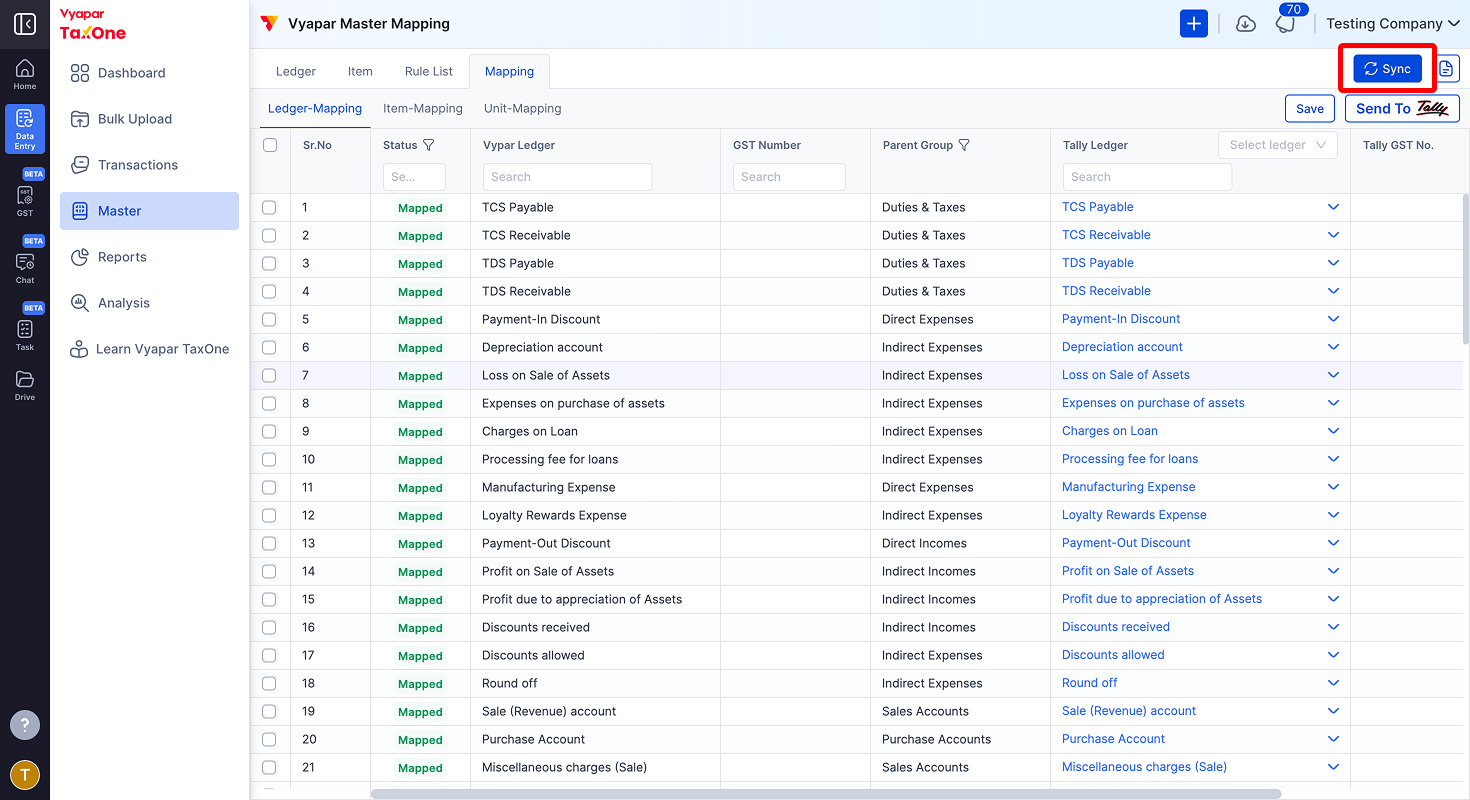
3. Once the sync is complete, your Vyapar data will be available in Vyapar TaxOne.
AI Weapon for Financial Soldiers